Introduction
Creating a static picture in DaVinci Resolve might seem simple, but many editors struggle with the best workflow to achieve professional results. Whether you want to turn a frame from your video into a still image or generate a high-resolution photo from scratch, DaVinci Resolve offers versatile tools to make this process smooth. In this article, we will explore step-by-step methods to create a static picture, cover advanced techniques to enhance image quality, and provide practical tips for both beginners and experienced editors. By the end, you’ll understand how to make a static picture in DaVinci Resolve efficiently and creatively.

Why You Might Want a Static Picture in DaVinci Resolve
Static pictures are not just for screenshots. They are essential in video editing for:
Creating thumbnail images for YouTube or other platforms.
Producing title cards, intros, or background visuals.
Extracting frames from video sequences for marketing materials.
Designing social media content with cinematic visuals.
DaVinci Resolve allows you to maintain professional color grading and resolution, ensuring your static pictures are high quality.
Step 1: Import Your Video or Image
To start, launch DaVinci Resolve and create a new project. Then, go to the Media Pool and import the video or image you want to work with. DaVinci Resolve supports formats like MP4, MOV, and RAW files, so you can work with footage from cameras like Blackmagic Pocket Cinema Camera 6K or DSLR recordings.
Tips:
Ensure your media is high resolution if you plan to export a crisp static picture.
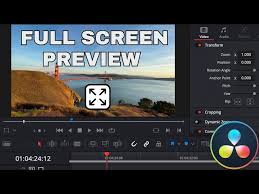
If working with a video, scrub through the timeline to locate the exact frame you want to capture.
Step 2: Set Up Your Timeline
Once your media is in the Media Pool, drag it to the timeline. Even if you only need a single frame, having it in the timeline allows you to apply color grading, effects, and adjustments before capturing the static picture.
Pro tip: You can extend the clip duration to several seconds to make editing easier. This won’t affect your static picture but allows better navigation.
Step 3: Color Grade and Adjust Your Frame
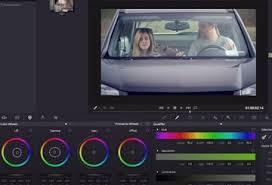
DaVinci Resolve is renowned for its color grading capabilities. Even if you just need a static picture, applying color corrections can dramatically improve your image. In the Color workspace, you can:
Adjust contrast and exposure.
Fine-tune white balance.
Apply LUTs (Look-Up Tables) for cinematic effects.
Use nodes to layer multiple effects without damaging the original footage.
Pro tip: For consistent results, use DaVinci Resolve Studio’s advanced color grading tools. They provide noise reduction and HDR enhancements that elevate your static images.
Step 4: Exporting the Static Picture
There are multiple ways to export a still image in DaVinci Resolve:
Method 1: Using the Gallery Stills
Go to the Color workspace.
Navigate to the Gallery panel.
Right-click on the viewer and select Grab Still.
Right-click the still in the Gallery and choose Export.
Select your preferred format (JPEG, PNG, or TIFF) and resolution.
Method 2: Deliver Page Export
Place the timeline playhead on the frame you want.
Switch to the Deliver workspace.
Choose Single Clip export.
Set the format to PNG or TIFF for highest quality.
Check Export Video and ensure the duration is a single frame.
Tips:
PNG is ideal for static images with transparency.
TIFF preserves maximum color depth and resolution, perfect for print or professional use.
Step 5: Advanced Techniques for Static Pictures
Upscaling Low-Resolution Frames
If your video frame is 1080p but you need 4K quality, consider using third-party tools like Topaz Video Enhance AI to upscale before or after exporting. DaVinci Resolve’s Super Scale feature (available in Studio version) can also enhance resolution with minimal quality loss.
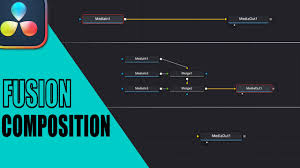
Adding Text and Graphics
For creating thumbnails or social media visuals, add text overlays or graphics in the Fusion or Edit page. Fusion allows for precise motion graphics, while Edit provides quick and intuitive text tools.
Noise Reduction and Sharpening
Static images often reveal video noise. Use DaVinci Resolve Studio’s temporal and spatial noise reduction for cleaner images. Apply sharpening cautiously to enhance details without introducing artifacts.
Step 6: Saving and Organizing Your Static Pictures
Once exported, organize your static pictures in folders with descriptive names, resolution info, and project references. This habit ensures quick access for thumbnails, marketing, or future projects.
Common Mistakes to Avoid
Exporting from the wrong timeline: Make sure the playhead is on the desired frame.
Ignoring color grading: A flat, uncorrected frame often looks dull compared to a color-graded image.
Over-compressing files: JPEG is convenient but can reduce quality; use PNG or TIFF for professional results.
Conclusion
Learning how to make a static picture in DaVinci Resolve is more than just taking a snapshot. It’s about leveraging Resolve’s color grading, effects, and high-resolution capabilities to produce professional-quality images. By following this guide—from importing media, color grading, exporting, to advanced enhancements—you can consistently generate static pictures that meet creative and professional standards. Whether for YouTube thumbnails, marketing visuals, or archival purposes, these techniques will ensure your images look polished and impactful.
Frequently Asked Questions
Q1: Can I make a static picture from a 4K video in DaVinci Resolve?
Yes, DaVinci Resolve supports high-resolution frames and can export 4K still images without quality loss.
Q2: What format is best for static pictures in DaVinci Resolve?
PNG is ideal for images needing transparency, while TIFF preserves maximum color depth. JPEG is suitable for web use but may compress details.
Q3: Can I apply Fusion effects to static pictures?
Absolutely. You can apply Fusion effects, overlays, and graphics to frames before exporting, giving more creative control over your static images.
Q4: Do I need DaVinci Resolve Studio for this?
While the free version can export static pictures, Studio offers advanced noise reduction, Super Scale, and more precise color grading tools, enhancing image quality significantly.