Introduction
If you’ve ever edited video in DaVinci Resolve, you know how valuable it is to see your project in full detail without distractions. Working in the default timeline view is fine for making cuts, adjustments, and edits, but when it comes to reviewing your work, the full-screen preview mode is a must. Whether you’re color grading, checking transitions, or refining visual effects, being able to view your footage in full screen helps you spot small details you might otherwise miss.
In this article, we’ll break down exactly how to use the DaVinci Resolve full screen preview, explore keyboard shortcuts that make it faster, and look at professional workflows that maximize your viewing setup.

Why Full-Screen Preview Matters in Video Editing
Video editing is all about details. The way light falls on a subject, the sharpness of a transition, or even subtle color shifts are not always obvious in the small viewer window inside the Resolve workspace. A full-screen preview lets you:
Catch mistakes early – Notice color mismatches, shaky footage, or rough cuts.
Preview for real-world display – Get a sense of how your work will look on a client’s screen or theater projector.
Work distraction-free – Remove the timeline clutter and focus only on the moving image.
Improve color grading precision – Subtle adjustments in Resolve’s Color Page are best judged on a larger, dedicated screen.
It’s no coincidence that professional studios often pair Resolve with high-end reference monitors like the Blackmagic Design SmartView 4K or external grading displays. Even if you’re working on a laptop, maximizing the full-screen preview is the closest way to replicate that experience.
How to Enable Full-Screen Preview in DaVinci Resolve
Using the On-Screen Menu
Open your project and go to the workspace menu in the top navigation bar.
Select Full Screen Timeline Viewer (sometimes labeled as “Cinema Viewer” depending on the version).
Your preview monitor expands to cover your entire display, hiding editing panels and tools.
This method is straightforward but can be a little slow if you need to toggle in and out frequently. That’s where keyboard shortcuts come in.
DaVinci Resolve Full-Screen Shortcuts
Keyboard shortcuts are one of the best time-saving tools for editors. In DaVinci Resolve, the default shortcut for full-screen preview varies slightly depending on your operating system.
Mac:
Command + FWindows/Linux:
Ctrl + F
Pressing this instantly toggles between full screen and the standard interface. If you’re reviewing footage multiple times per session, this shortcut is a game-changer.
Customizing Your Shortcuts
DaVinci Resolve is flexible when it comes to keyboard shortcuts. If Command + F or Ctrl + F doesn’t feel intuitive, you can customize it.
Go to DaVinci Resolve > Keyboard Customization.
In the search bar, type Cinema Viewer or Full Screen Viewer.
Assign a new shortcut (for example,
Shift + SpaceorF11) that fits your workflow.Save your layout and start using it immediately.
Many editors choose to match shortcuts from other software like Adobe Premiere Pro or Final Cut Pro to keep muscle memory consistent across platforms.
Using Full-Screen Preview on Dual Monitors
If you’re editing on a dual-monitor setup, DaVinci Resolve allows you to dedicate one monitor entirely to the viewer. This is especially helpful for colorists and professional editors.
To set it up:
Go to Workspace > Video Clean Feed.
Select the display you want to dedicate as your full-screen monitor.
Now, whenever you play your timeline, it appears full screen on that monitor while your primary monitor shows your editing tools.
This feature is particularly powerful when paired with an external GPU (eGPU) or hardware like the Blackmagic UltraStudio 4K Mini, ensuring playback is smooth even with heavy effects.
Full-Screen Preview in Different Pages
DaVinci Resolve has several pages—Edit, Cut, Color, Fusion, Fairlight—and full-screen preview behaves slightly differently in each.
Cut Page: Useful for quickly reviewing edits before exporting.
Edit Page: Essential for spotting jump cuts, overlapping transitions, and pacing issues.
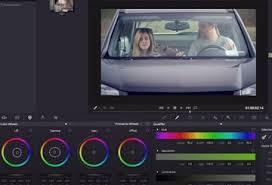
Color Page: Practically mandatory for colorists to judge hues and contrast properly.
Fusion Page: Allows you to see compositing or VFX without interface clutter.
Fairlight Page: Less common, but can be used to preview synced audio with visuals.
Knowing when to use full screen based on your workflow helps you make more precise creative decisions.
Advanced Options: Clean Feed and External Monitors
For editors working at a professional level, relying solely on a laptop screen isn’t enough. Blackmagic Design provides Clean Feed output, which delivers a distraction-free, full-screen image to a connected monitor.
Requirements:
A GPU that supports multiple display outputs.
A second monitor or reference display.
(Optional) Blackmagic hardware like DeckLink or UltraStudio for broadcast-quality output.
Once enabled, Clean Feed ensures you’re looking at a color-accurate, full-resolution version of your edit.
Troubleshooting Full-Screen Preview
Sometimes editors run into issues where the full-screen preview doesn’t work as expected. Common problems include:
Playback stutter in full screen – Usually caused by insufficient GPU power. Solution: lower timeline resolution or use optimized media.
Shortcut not responding – Check if the shortcut has been reassigned in Keyboard Customization.
Black screen on external monitor – Ensure Clean Feed is enabled and that your monitor is correctly selected in Workspace settings.
Incorrect aspect ratio – Adjust the project settings under Timeline Resolution to match your footage and display.
Real-World Example
Consider a filmmaker editing a short film shot in 6K on a Blackmagic Pocket Cinema Camera 6K Pro. On the laptop’s small preview window, color shifts in the shadows might go unnoticed. But by toggling to full-screen preview or connecting a calibrated external display through Resolve’s Clean Feed, the editor can catch those details. This step ensures the film meets professional quality standards when projected at a festival or streamed online.
Best Practices for Using Full-Screen Preview
Use it regularly, not just at the end. Preview in full screen as you edit to catch mistakes early.
Pair with good headphones or studio monitors. A full-screen image paired with high-quality audio gives a more accurate sense of the final product.
Leverage dual displays if possible. One for the edit interface, one for a clean preview.
Calibrate your monitor. Tools like the X-Rite i1Display Pro ensure your full-screen preview is color accurate.
FAQs
Q1: What is the shortcut for full screen in DaVinci Resolve?
On Windows and Linux it’s Ctrl + F, and on macOS it’s Command + F.
Q2: Can I assign a custom shortcut for full-screen preview?
Yes. Go to Keyboard Customization, search for “Cinema Viewer,” and assign any shortcut you prefer.
Q3: How do I enable full screen on an external monitor?
Use Workspace > Video Clean Feed and select your secondary monitor.
Q4: Why does playback stutter in full-screen preview?
This often happens due to hardware limitations. Optimize your media or lower timeline resolution for smoother playback.
Q5: Do I need special hardware for Clean Feed?
No, but for broadcast-quality output, hardware like Blackmagic DeckLink or UltraStudio is recommended.
Conclusion
The DaVinci Resolve full screen preview is more than just a way to watch your footage without distractions—it’s a vital tool for catching errors, refining color, and ensuring your project looks professional on any screen. By learning the shortcuts, customizing your workflow, and even using external monitors with Clean Feed, you can dramatically improve your editing and grading accuracy.
Whether you’re a beginner experimenting with YouTube videos or a professional working on a feature film, mastering full-screen preview in Resolve is one of those small steps that makes a big difference in your editing process.