Introduction
Green screen, also known as chroma keying, is one of the most powerful techniques in video production. It allows you to replace a solid background—usually green or blue—with another image or video. From blockbuster films like Avengers: Endgame to YouTube tutorials, the green screen effect is everywhere.
The good news is that DaVinci Resolve, the free and Studio version by Blackmagic Design, comes with professional-grade tools to handle green screen editing. Many beginners think it’s complicated, but once you understand the process, creating seamless composites in DaVinci Resolve becomes straightforward.
This guide breaks down every step of working with DaVinci Resolve green screen, explains common problems, and provides pro tips for professional-quality results.

Why Use Green Screen in DaVinci Resolve?
DaVinci Resolve is more than just a video editor—it’s a complete post-production suite with Fusion (for VFX), Fairlight (for audio), and an industry-standard color grading workspace. Using it for green screen work has several advantages:
Precision: Resolve’s Delta Keyer and Ultra Keyer tools provide fine control over edges and spill suppression.
Integration: You can combine chroma keying with advanced color grading for natural results.
Professional quality: Major film studios use DaVinci Resolve for compositing and finishing.
Affordability: Even the free version includes keying tools, though Resolve Studio ($295 one-time purchase) unlocks more advanced options.
A 2022 survey by StudioBinder found that over 60% of independent filmmakers rely on DaVinci Resolve for VFX or finishing work, proving its growing dominance in professional environments.
Preparing for a Successful Green Screen Shoot
Before you even open DaVinci Resolve, your results depend heavily on how the footage is shot.
Lighting: Ensure even lighting across the green screen to avoid shadows and hotspots.
Wardrobe: Avoid clothing with green tones to prevent transparency issues.
Camera Settings: Shoot at the highest bitrate possible to preserve detail. ProRes, DNxHR, or Blackmagic RAW are preferred over heavily compressed codecs like MP4.
Background Quality: Use a wrinkle-free screen or backdrop for cleaner keying.
Good source footage reduces editing time by up to 50% because it minimizes the need for excessive adjustments later.
Step-by-Step: How to Do Green Screen in DaVinci Resolve
Step 1: Import Your Footage
Launch DaVinci Resolve and create a new project.
Go to the Media Pool and import both your green screen clip and your background video or image.
Step 2: Place Clips in the Timeline
Drag the green screen footage to Video Track 2.
Place the background footage on Video Track 1 so it sits underneath.
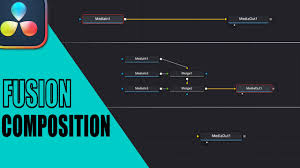
Step 3: Open the Fusion Tab
With the green screen clip selected, go into the Fusion workspace.
By default, you’ll see a MediaIn node connected to a MediaOut node.
Step 4: Add the Delta Keyer
Press Shift + Spacebar, type Delta Keyer, and add it to your node tree.
Connect MediaIn → Delta Keyer → MediaOut.
Step 5: Select the Background Color
In the Inspector, use the eyedropper tool to sample the green area of your footage.
The green background should disappear, leaving only your subject.
Step 6: Refine the Key
Use Clean Black and Clean White sliders to improve transparency and keep subject details sharp.
Adjust Despill to remove leftover green edges.
Soften edges slightly for a natural blend with the background.
Step 7: Composite with the Background
Return to the Edit page.
Ensure the keyed clip (with subject) is on the higher video track, and your background clip is below it.
Resize and reposition the subject if needed using the Transform controls.
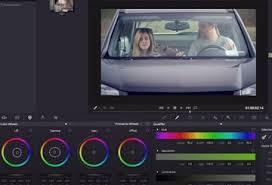
Step 8: Add Color Grading for Realism
In the Color page, adjust your subject to match the lighting and tone of the background.
Common tweaks include lowering shadows, adjusting white balance, and applying subtle LUTs.
Common Green Screen Problems in DaVinci Resolve (and Fixes)
1. Jagged Edges Around Subject
Solution: Increase softness and refine the matte using Delta Keyer’s Matte Finesse controls.
2. Green Spill on Hair or Clothing
Solution: Use the Despill slider or add a secondary color corrector to neutralize green tones.
3. Subject Looks Out of Place
Solution: Apply color matching so that skin tones and shadows align with the background environment.
4. Poor Performance During Playback
Solution: Use optimized media or proxies, especially if you’re working with 4K/6K footage.
Advanced Techniques for DaVinci Resolve Green Screen
Garbage Mattes: Use polygon masks to cut out unwanted parts of the frame before applying the keyer.
Multiple Keyers: Sometimes combining the Delta Keyer with the Ultra Keyer produces a cleaner composite.
Tracking Movement: If the camera is moving, use Resolve’s planar tracker in Fusion to keep the keyed subject aligned.
Light Wraps: Add a subtle light wrap effect so the subject blends naturally with the background light source.
Real-World Applications of Green Screen in Resolve
YouTube Creators: Many influencers use green screen for reaction videos or gaming streams.
Corporate Training Videos: Companies integrate presenters with branded slides or animations.
Film Production: Indie filmmakers use Resolve Studio for cost-effective chroma keying at cinematic quality.
For instance, the short film Code 8 (2019), produced on a modest budget, used DaVinci Resolve extensively in post-production, including chroma key work.
FAQs
Q1: Can I do green screen in the free version of DaVinci Resolve?
Yes, the Delta Keyer is available in both free and Studio versions.
Q2: Is Delta Keyer better than Ultra Keyer?
Delta Keyer is generally more advanced, offering finer controls. Ultra Keyer is simpler and works well for quick edits.
Q3: What format should I shoot for best results?
Use high-bitrate formats like ProRes, DNxHR, or Blackmagic RAW. Avoid compressed formats like H.264 when possible.
Q4: How do I stop my subject from looking “cut out”?
Use color grading and light wrap techniques to integrate them into the new background more naturally.
Q5: Does DaVinci Resolve support blue screen as well?
Yes, the same chroma keying process applies to blue screens.
Conclusion
Mastering DaVinci Resolve green screen editing opens creative possibilities, from YouTube videos to feature films. By combining the Delta Keyer, Fusion tools, and professional-grade color correction, you can create composites that look polished and natural.
While it takes practice to refine your technique, the results are worth it. Start with well-lit footage, use Delta Keyer adjustments carefully, and finish with color grading to make your subject feel at home in their new environment.
Whether you’re a hobbyist experimenting with special effects or a professional editor working on client projects, DaVinci Resolve provides everything you need to achieve Hollywood-quality green screen effects—without the Hollywood budget.