Introduction
Color grading is one of the most transformative aspects of video editing. It allows filmmakers, content creators, and YouTubers to give their footage a professional, cinematic look. For those wondering how to color grade in DaVinci Resolve, this guide breaks down the process from beginner-friendly basics to advanced techniques.
DaVinci Resolve, developed by Blackmagic Design, is recognized as the industry standard for professional color correction and grading. It offers both a free and Studio version, giving creators powerful tools without needing expensive subscriptions. Whether you’re working on a short film, commercial project, or social media content, mastering color grading in DaVinci Resolve can elevate your visual storytelling significantly.

Understanding Color Grading
Before diving into DaVinci Resolve, it’s important to understand the fundamentals of color grading:
Primary Color Correction: Adjusting contrast, brightness, and white balance to ensure a balanced and accurate baseline image.
Secondary Color Correction: Targeting specific colors or areas in the frame for creative enhancements.
Look Creation: Applying stylistic tones and color palettes to evoke mood or emotion.
Effective color grading not only makes footage visually appealing but also supports narrative storytelling by guiding the audience’s perception and emotion.
Getting Started with DaVinci Resolve
DaVinci Resolve is structured into different workspaces called pages: Media, Cut, Edit, Fusion, Color, Fairlight, and Deliver. For color grading, the Color Page is your main workspace.
System Requirements
Windows 10/11 64-bit or macOS 10.15+
At least 16GB RAM (32GB recommended for heavy projects)
GPU with at least 4GB VRAM for real-time playback
Project Setup
Open DaVinci Resolve and create a new project.
Import your footage via the Media Page. Ensure clips are in a high-quality format (RAW, ProRes, or DNxHR recommended).
Switch to the Color Page to begin grading.
Step 1: Primary Color Correction
Primary color correction is the foundation of any grading workflow. It involves balancing your footage before applying creative looks.
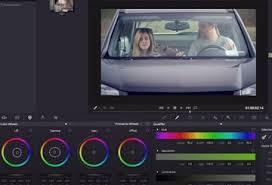
Adjust Exposure and Contrast: Use the Lift, Gamma, Gain wheels to control shadows, midtones, and highlights. For example, lifting shadows brightens dark areas, while lowering Gain prevents highlights from clipping.
White Balance Correction: Use the Color Temperature and Tint sliders to ensure whites look neutral. Incorrect white balance often makes skin tones look unnatural.
Saturation Control: Increase or decrease overall saturation to make colors more vivid or muted depending on the scene.
Pro tip: Enable Scopes like Waveform and Parade to monitor exposure and RGB balance precisely.
Step 2: Secondary Color Correction
Secondary color correction allows you to refine specific colors or isolate objects:
Qualifier Tool: Select a color range, such as skin tones, sky, or clothing.
Power Windows: Apply adjustments to a specific area of the frame, like brightening a subject’s face while keeping the background untouched.
Tracking: If the subject moves, use DaVinci Resolve’s tracker to follow the area automatically.
This step is essential for creative control and producing professional-grade footage.
Step 3: Creating a Look
Once your footage is balanced, it’s time to apply a style or look:
LUTs (Lookup Tables): Predefined color profiles that can simulate film stocks or cinematic tones. DaVinci Resolve includes several built-in LUTs and allows importing custom ones.
Curves: Use custom curves for precise tonal adjustments, creating unique color grading aesthetics.
Color Wheels and Split Toning: Adjust shadows, midtones, and highlights individually to craft mood. For instance, teal shadows and orange highlights are a popular cinematic look.
Pro tip: Avoid over-grading. Subtlety often produces a more professional and natural result.
Step 4: Matching Shots
Consistency across shots is crucial for professional editing:
Use the Color Match Tool to automatically match color and exposure between different clips using a reference image or chart.
Manually tweak the Color Wheels and Curves to ensure uniformity.
Consistency ensures your video maintains a cohesive visual style, which is especially important for narrative films or multi-camera shoots.
Step 5: Final Touches and Export
Before rendering your project:
Check your Scopes one last time to avoid clipping or crushed blacks.
Apply Noise Reduction if necessary, particularly in low-light footage.
Use the Deliver Page to export in the desired format. For web content, H.264 or H.265 is common. For professional delivery, use ProRes or DNxHR.
Advanced Techniques in DaVinci Resolve
For more experienced users, these techniques can elevate your grading workflow:
HDR Grading: For high dynamic range footage, adjust metadata and exposure to maximize detail in highlights and shadows.
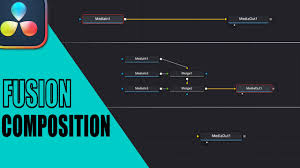
Node-Based Workflows: Organize color correction and creative grading in multiple nodes for non-destructive editing.
Fusion Integration: Combine compositing effects with grading for complex visual storytelling.
ACES Workflow: Use Academy Color Encoding System for standardized color management across multiple cameras and formats.
These advanced methods are widely used in feature films, commercials, and professional YouTube content.
Common Mistakes to Avoid
Over-saturating colors, which can make footage look unnatural.
Ignoring scopes and relying solely on the viewer’s monitor.
Applying inconsistent grading between shots.
Overusing LUTs without subtle adjustments.
Correcting these mistakes ensures that your DaVinci Resolve color grading work appears polished and professional.
Frequently Asked Questions
1. Do I need DaVinci Resolve Studio for color grading?
No. The free version of DaVinci Resolve includes most primary and secondary color grading tools. Studio is recommended for advanced features like noise reduction and HDR grading.
2. How long does it take to color grade in DaVinci Resolve?
For simple projects, a basic grade can take 30–60 minutes. Advanced grading with multiple shots may take several hours.
3. Can I use LUTs in the free version?
Yes. DaVinci Resolve Free supports LUTs, which can be applied globally or to individual clips.
4. Is color grading the same as color correction?
No. Color correction fixes exposure and balance, while color grading applies stylistic tones and looks.
5. What is the best monitor for color grading?
A calibrated monitor with at least 100% sRGB coverage is recommended. Professional colorists often use DaVinci Resolve-certified displays.
Conclusion
Learning how to color grade in DaVinci Resolve transforms ordinary footage into cinematic-quality videos. By mastering primary and secondary color correction, creating cohesive looks, and using advanced node-based workflows, creators can elevate their storytelling while maintaining consistency across projects.
Whether you’re a beginner or an experienced editor, DaVinci Resolve offers the tools to create professional-grade videos without breaking the bank. By practicing regularly and understanding both technical and creative aspects of grading, your videos can achieve a polished, visually striking look that captivates viewers.