Introduction: Why Connect Moises with iTunes?
If you're a musician, producer, or music educator, you're probably using Moises—the AI-powered audio separation and music practice app—to isolate vocals, extract stems, or change pitch and tempo. But what if your music library lives inside iTunes (now part of the Apple Music ecosystem)? The question “How to use Moises with iTunes?” has become more relevant than ever.
In this guide, you’ll learn exactly how to import iTunes music into Moises, troubleshoot file compatibility issues, and get the most out of your existing library without violating copyrights or hitting unnecessary roadblocks.

Understanding the Moises App and iTunes File System
Moises is available on iOS, Android, and web. It works by analyzing audio files and separating them into individual tracks (vocals, drums, bass, etc.) using AI. You can upload your own files in formats like MP3, WAV, M4A, and others.
iTunes, now integrated with Apple Music, stores tracks you've purchased or imported. But not all iTunes tracks are usable by default—especially DRM-protected files or streaming-only content.
To effectively use Moises with iTunes, you need access to downloaded, unprotected audio files stored locally on your device or synced to your iCloud Drive or Files app.
Step-by-Step: How to Use Moises with iTunes on iPhone or iPad
Step 1: Export Your iTunes Tracks
Open the Apple Music app (formerly iTunes).
Locate the song you want to use.
Make sure it is downloaded and not just streamed. You'll see a download icon if it's not stored locally.
Avoid using Apple Music DRM-protected tracks—Moises cannot read encrypted content.
Step 2: Save the Track to Files
To get your song into Moises, it must be accessible through the Files app:
Open the Music app.
Use a Mac or PC with iTunes to drag the song out of the app into a local folder or export it.
From your computer, transfer the audio file to your iPhone using AirDrop, iCloud Drive, or File Sharing in Finder/iTunes.
The audio will now be available in your Files app under "On My iPhone" or "iCloud Drive."
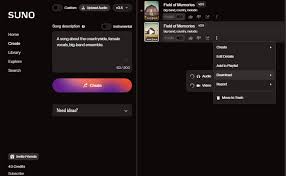
Step 3: Upload to Moises
Open the Moises app.
Tap the plus (+) icon to start a new project.
Choose Import from Files.
Navigate to the folder where you saved your song.
Select the file, and let Moises do its magic.
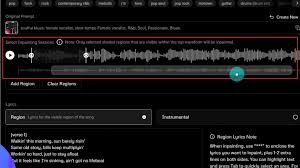
Once uploaded, you’ll be able to separate vocals, mute instruments, shift pitch, and more.
Using Moises with iTunes on a Computer (macOS/Windows)
For macOS Users:
Open Music app (formerly iTunes).
Drag the desired track to your Desktop or another folder.
Visit https://moises.ai and log in.
Click Upload Track > Select the exported file.
Wait for Moises to process the file. You’ll be able to customize stems directly from the browser.
For Windows Users:
Open iTunes, find the track.
Right-click the song > Show in Windows Explorer.
Copy the file to your Desktop or local folder.
Open Moises Web App and upload the file.
Common Problems When Using Moises with iTunes
Problem 1: The file is grayed out or cannot be selected
→ This usually means it’s DRM-protected (most Apple Music streaming content is). You cannot use these files in Moises. Try uploading from CD-ripped songs or MP3s purchased outright.
Problem 2: File format not supported
→ Moises supports MP3, WAV, FLAC, M4A, AAC, OGG, and a few others. If your iTunes song is in ALAC or another unsupported format, convert it using tools like Audacity or online converters.
Problem 3: “File too large” error
→ The Moises app limits individual file sizes depending on your plan (Free or Premium). Consider compressing long tracks or upgrading your plan for extended uploads.
Tips to Get the Most Out of Moises with iTunes
Batch Export: If you're working on an album or live set, batch export your iTunes files and upload them to Moises all at once from your computer.
Edit Metadata: Before uploading, make sure your track names and tags are correct. Moises retains this info in project files.
Stem Downloads: Premium users can download high-quality stems from iTunes tracks, perfect for remixing or live DJing.
Real-World Use Case
A Berklee music student shared:
"I’ve got over 1,000 songs in my iTunes library. With Moises, I was able to isolate sax solos from jazz tracks for transcription assignments. I just exported the tracks from iTunes on my Mac and uploaded them to Moises—it worked flawlessly."
This kind of use case shows how deeply valuable combining these two tools can be for music education and practice.
Conclusion: Moises and iTunes—A Powerful Duo
Using Moises with iTunes unlocks a new layer of control over your music. Whether you're practicing a solo, remixing a track, or analyzing song structure, Moises gives you tools you simply don’t get in iTunes or Apple Music.
Just remember: make sure the audio files are unprotected and locally accessible through the Files app or your computer’s file system. Once you’ve got the right format, it’s smooth sailing—and stem separation—every time.
FAQ: How to Use Moises with iTunes
Q1: Can I use Apple Music streaming songs in Moises?
No. Songs streamed from Apple Music are DRM-protected and cannot be uploaded to Moises.
Q2: Is there a way to remove DRM protection?
Legally, no. The best way is to use songs you own (purchased downloads, ripped CDs, etc.).
Q3: Does Moises support iTunes playlists?
Not directly. You must export individual tracks as files.
Q4: Will Moises alter my original iTunes files?
No. Moises only works on uploaded copies and does not modify your local music library.
Q5: Can I use Moises with my iTunes library on Windows?
Yes. As long as the files are DRM-free, you can upload them from File Explorer.
Learn more about AI MUSIC